Garden Planning and Planting: Fresh Peas
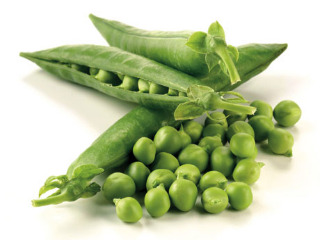
 The weather pattern normally turns hot in this growing zone-usually-before the peas can be picked; that means wilted shelling peas and poor nitrogen fixing in the soil before we put in early corn. Proper selection and planting may save the day. First let us look at how to grow in our small space, this is not to imply you can not grow more in a larger space, keeping in mind you have to blanch and freeze the peas, or laboriously can them. Some of the peas you will dry for next year?s seed too. The basic problem with peas is that they are too delicious. Our ? lb seed peas will yield about ? bushel, shelled; more if you plant snap peas.
An early pea such as the Alaska early dwarf is a good starter. Another one is Dakota, check your Territorial? Seed Catalog, page 60, item #PE631. Generally, many people with hot weather experience choose: Wando.
Gone are the days of rigging pea fences, strings and such. It is much easier to till a loose wide row-or wide bed intensive pea patch. Garden peas do well with a NPK of 5-10-5 and a pH of 6.5. You can accomplish this with a 1/8 lb of blood meal, or cotton seed meal, 2 lb of rock phosphate and 1 lb of greensand powders-tilled in to our mini 5? X 10? plot. Peas like lots of organic material in the soil bed to conserve moisture.
You must also purchase nitrogen-fixing bacteria for your peas and beans. Look to Southern States, if your garden center does not have this. Place your peas in a bowl, barely add a cup of water, then sprinkle a pea-bean-legume nitrogen-fixing bacteria in the bowl and mix it with the peas. The wrinkled somewhat dry peas will be covered with the black mix.
Some Old Timers use to make a syrup solution to make the peas sticky to hold the nitrogen fixer, but in reality if you have been growing peas and beans with success, the soil already has the necessary bacteria, and the use of syrup was in hard times when you borrowed a handful of dirt from the neighbors pea patch to inoculate your own
With the peas inoculated, the next step is to broadcast them over the pea patch with a spread of 2 inches apart. Practice makes perfect, so in the first trials you can pick and move a few. Now poke them down in the compost-soil about 2?. They will absorb moisture and soon start to show sprouts.
You can also just cover the peas with about 2? of compost and they will grow right up through it, happy too. I prefer to use pelted-ground up compost. This is a plug for a hammer mill shredder, which we will be discussing next fall.
Most garden peas grow about 18? to 24? high, depending on the nitrogen in the soil. These plants will fall over in a rain, or by the sheer weight of the pea pods. To reduce this problem of matting you can insert into the ground: supports. I use my fruit tree branches I prune each spring. These are about 2? long and branched out a foot.
I insert hither and yon and it does fine for support. The extra nitrogen fixed in the soil from the peas will add to the next crop: a warm weather crop of corn.
Tag the best early and strongest plants for the ones to save seed from. Plant peas now- early as you can.
Pole peas, such as Alderman, are great, producing more and using less ground space. They really need to be planted a bit earlier, even as early as last late winter. Plant them as you would Pole beans. In fact you could follow the Alderman peas that grow upwards of 6? with pole beans, or the wonderful Diva cucumbers, thereby avoiding the moving of the poles. I have tried lots of poles over the years and have decided, for my pea picking to purchase PVC 1 ?? X 10? pipes, that last forever. Rough them up with sand paper. Insert the poles securely in the ground 18? or so. Next reach up and see if you can place a 5-gallon bucket over the pole top. Most likely you will have to cut the poles down to your reach using a hacksaw or a PVC scissor cutter. If you have several sections of short cut off pipe you can purchase sleeves and PVC glue that will join them together. That makes another complete pipe.
The purpose of the bucket is in case of surprise ice and freezing temperatures for tender plants in the beginning. Placing a 14? automotive worn out tire (re-cycling again) over the pole, centering it and filling with aged manure and/or compost is a boost, as it warms the seed and conserves moisture-especially good with pole beans and vine cucumbers which like heat.
Place seeds in a ring around the pole-outward perhaps 6?. Once up, thin to about 5 best plants. You will have to cut an even 1 7/8th ? hole in the center of the bucket to slide up and down the pole. I use a Forstner drill bit, which eliminates breaking the plastic. Big Lots?, and Harbor Freight Tools? have the best prices.
Anytime you use a hot cap, milk carton, bucket, etc as a bell cloche over a plant it will heat up in the sun. You have to be attentive to lifting the bell cloche off the plants or they will cook in the sun warmth very quickly. Now you are up with the birds.
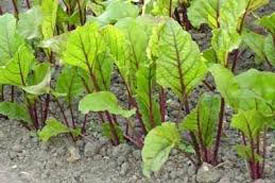
Let us assume in our mini plot we put in six poles. In the surrounding area we can plant lettuce, beats, chard, spring onions etc.
When harvesting your peas do not leave them in the bucket for long, as they will get slimy. Shell, or snap soon, blanch, and store in the freezer in seal lock bags. Feed the shells to your rabbits and chickens, otherwise they make good compost starter.
Copyright: 2008, Back2theLand, Mark Steel.


